Tuesday, May 31, 2011

Build a "Vintage" Ladder

I've been having a serious love affair with vintage ladders lately but we have been having difficulty finding one that isn't expensive. So what's a girl to do?  Build one!  It cost less than $10 to make this, which makes a lot more sense to me.  Here's what you need....
Two 1 1/4 inch dowels and two 1 x 3's 6 feet in length from your local building center.
With a miter saw, cut each dowel into 3 pieces giving you 6 equal pieces.  They should each be 16 inches long.  You will only need 5 of these.
Measure how far from the end you would like your dowel to be and mark it. Mine was approximately 8 inches. Place your dowel on your mark, making sure it's centered on the wood and trace it with a pencil. This is where you will drill your hole.
Using a drill with a 1 1/4 inch saw drill bit, drill your hole, making sure to not go through the wood on the other side, like I did. No worries if you do, wood filler will fix it up. This is what it will look like.
Repeat this process at the other end of your board. Then measure the distance between the two holes and divide by two to get the center measurement for the center hole. Drill that hole. Then measure the distance between your end hole and center hole and divide by two again to get your two remaining hole placement measurements. You just want to make sure there is an even amount of space between each dowel. Repeat this step with your other board. It helps to line up all your dowels and trace with a pencil to make sure everything lines up BEFORE drilling into the wood. Next, apply wood glue into each hole and then insert the dowel. Repeat with remaining dowels. Then attach the other board to the top. This part is definitely a two person job. Hubby was giving me a hand. :)
Now, obviously this ladder is NOT going to be used as a ladder.  But to make sure it was stable and didn't come apart, we drilled 1 1/2 inch screws through the outside of the board where each dowel was inserted. Sink the screws into the wood and then fill the holes with wood putty.  After your wood putty dries, go over it with fine sandpaper to give it a smooth finish.  Looks like a ladder, right?! To give it a "vintage" look, I first took my palm sander and sanded down the edges and ends to soften them up and create a rounded, worn down look.
Then grab a can of Minwax special walnut stain and slather on a thick layer of it, let it absorb for 15 minutes or so and then wipe off excess with an old rag. You're done for the day as this needs to dry overnight. Go relax with a glass of cold lemonade in a pretty glass and a good movie with someone you love.
After 24 hours, grab some white paint and paint one coat over the stain. Again, this needs to dry for several hours.
After the paint has dried thoroughly, take your palm sander, or a piece of medium to fine grit sandpaper and start sanding off the white paint in areas where there would be normal wear. You want to sand down to the stain so you will be removing a lot of the white paint in some areas.
When it looks good and distressed, take a piece of extra fine sandpaper or steel wool and smooth out the surface. Remove dust with a tack cloth and your done!
A vintage ladder for less than $10 instead of the $30+ I've seen them sell for. It doesn't bother me that it isn't really vintage, it was the "look" I was after.
These ladders are so charming and are perfect for holding fluffy white towels, favorite magazines or anything else that makes you happy. I made this for our master bath which is the next room currently getting a redo. Pics of that coming this week. I've got a couple of other fun projects lined out for that room so stay tuned. I hope this tutorial was helpful if anyone would like to make a faux vintage ladder! Have a happy day!  Linking up with The Lettered Cottage and Stay At Home Nation this week!
The Lettered Cottage

Sunday, May 29, 2011

Pea Pesto Crostini

If you're looking for a delicious, easy recipe for Memorial Day weekend, this appetizer from Giada does not disappoint.   I've made this so often that it is now a staple in our home.   We love it so much I just had to share.  But I also wanted to share this photo......my mom bought me a new camera for my birthday and I am positively giddy over the photos it produces.  Thank you Mom!  Can't wait to share my photos of my current home projects this week!  Try this recipe, you can find it here!  Happy weekend all!

Friday, May 27, 2011

Sign of life...


May I introduce to you the latest member of the rust family in the Swenglish household?
Well, although I do feel a little rusty myself,
having offered only silence in the blog community for three weeks,
I am actually referring to another rusty, silent new friend...
Love at first sight,
this old flour barrel beckoned me in a truly irresistible manner some time ago,
at my favourite bargarin hangout in Bath.

Perhaps, together with all the plants,
it gives this area that "shop display feel" I am trying to avoid...?
However, having claimed this corner for several weeks now,
the flour barrel seems to enjoy its new habitat,
and who am I to argue with that...?
So I brush past the little lavender tree as often as I can,
letting the stunning scent fill the room and my senses.
Rusty it may be, but this is definitely a little corner of summer.


A huge thank you all for your kind words of
encouragement during my blog silence
- every word such a source of joy and positive energy.
I am still "lying a little low",
but continue to silently enjoy your lovely blogs.

Wishing you a fabulous, summer-scented weekend!
Helena

Hello Weekend

After of week of such scary weather, is anybody as ready for a relaxing holiday weekend as we are? I'm looking forward to spending time with my family and working on some cool projects.
How cute are these little pies in a jar? I am so going to make some of these this weekend. Sometimes all it takes is a photo like this for creativity to take hold again and get your imagination working in exciting ways. After a week of feeling uninspired, I finally have some fun things that I'm working on that I look forward to blogging about after the holiday weekend.
(Photo via google image)
Hope everyone has a fun and safe Memorial Day weekend! A big thank you to all those who are serving or have served in order to preserve our freedom.


Monday, May 23, 2011

How To Build A Rustic Kitchen Table Island

To start building your rustic center table for your kitchen like the one I built for my kitchen makeover, you will need some aged wood. This could be anything, I used old barn wood, but old pallet wood would work, or any kind of old wood. Give it a good scrubbing with soap, water and a scrubbing brush, then let dry.
Whenever I build a table like this, I always start with the top first and then determine the rest of my measurements based on that. So, after I determined how big I wanted the top to be, I chose the best pieces of wood. Again, since you are using beautifully aged wood, look for your most visually pleasing pieces. The table top measurements were 23 inches x 37 inches. Three pieces of wood placed side by side was 23 inches across so that is how I determined that measurement. I cut three of those planks to be 37 inches in length and layed them TOP SIDE DOWN, side by side on the ground. You don't want any gaps between the boards.
I then took another two boards and cut them to be 18 inches in length. These are the pieces that will connect all three planks together. I placed them across the three planks and attached using wood screws. It's important to note that when using screws, it's best to pre-drill your holes first with a drill bit so your boards won't split and doing so makes it much easier to sink your screws. As you can see, you want the cross pieces to be shorter than the length of the planks to allow for the sides (aprons) of the table. This is the under side of your table top.
Next, onto the legs. My hubby grabbed some 2 x 4's off the old barn so that is what I used for the legs. Determine your measurements. I wanted my table to be countertop height, so, I cut four 2 x 4's to be 3 feet in length. Place them on each corner of your table top. You want them about an inch from each edge. Make sure they are in the correct position because this is how we will determine the measurements for the apron (side) of the table. Starting with the short end of the table, measure from the outside of one leg to the outside of the other leg close to the tabletop. Cut a piece of wood that length. In my case, it was 20 1/2 inches. This is the side of your table for one end. You can go ahead and measure the other end and do the same thing. If everything is lined up, attach the side to the legs by using wood screws. I used two 2 1/2 inch screws and just inserted them from the outside, this is a rustic table, doesn't need to be perfect. Make sure that the ends of each side are flush with the outside of the table legs. Do the same thing for the long side but this time measure from end to end starting at the side you just attached. My two end pieces were 20 1/2 inches and my two long pieces were 3 feet in length.
After all your sides are attached, we're half way finished! Next you want to attach the top to the legs and aprons. Grab some wood scraps and cut both ends at a 45 degree angle, as shown in the photo below, using a miter saw. These will fit into the corners underneath the tabletop. First, drill two screws into the top of that piece into the tabletop. Make sure your screws are short enough that the will go through the wood into the table but not come out the top of the table. Yep, it happened to me. :) Then insert a screw into the end of the angle cut wood into the side of the table, again, make sure it doesn't come out the other side. You will be drilling the screw in at an angle.
Do this with all four corners. Flip it over and there is your table. Now, I wanted a bottom shelf on my table to hold my larger dutch oven pots and I didn't get any photos of the process so I will tell you how I did it, it's easy.
While my table was still upside down on the ground, I measured 7 inches from the top of the leg (which would actually be the bottom of the leg if it was right side up) and marked it. I did this for each leg. Now, cut two more pieces of wood to match your two end cuts for the apron, again, mine were 20 1/2 inches. Attach this piece, flat side against leg, with wood screws. Repeat for other side. This will give you a "ledge" for adding planks for a bottom shelf. Measure the distance from ledge to ledge and cut three more planks accordingly. Mine were 30 inches in length. Since this is the bottom shelf of your table, it is okay if there are gaps between your planks and you don't have to use three if you don't want to. I used two planks that were the same width as my top table and one smaller one. Remember, it's rustic. :) It's not supposed to be perfect. Here is a closeup of mine.
And the building part is finished! Next step is the sanding. Grab yourself some sandpaper or a palm sander and sand that wood down until it's smooth. To start, I used 100 grit sandpaper because the grain of this barn wood was very rough. Then I switched to 220 grit to give the top a very smooth surface. After all your sanding is complete, give it a good dusting with some tack cloth. Next, to give it a good shine and a lot of depth, I applied three coats of polyurethane, letting dry a good bit between coats. Then a final light sanding after the top was completely dry made for a very smooth surface. And that's it! I absolutely love how the wood has so much more depth after sanding and sealing.
Since we didn't spend any money at all on this table, that meant we could spend a little on accessories for the table, so my hubby bought this gorgeous double towel rack for me at Lowe's. This is actually what inspired me to build the table. And what would a gorgeous towel rack be without a fun kitchen towel to hang from it. How adorable is this kitchen towel?
Anthropologie
I bought one and I just love it! It hangs from the towel rack along with several of my vintage kitchen towels. I love the cute little aprons and towels hanging from the clothesline. It's definitely one of those small things that can make you happy just by looking at it. You can pick one up for yourself here.
It was fun making this and I really think it adds warmth to our kitchen. And the bonus is, it provides more storage for pots and pans. I hope my instructions were easy enough to understand if anyone else would like to give it a go. Questions are always welcome!
The Lettered Cottage

Wednesday, May 18, 2011

Kitchen Makeover

Our kitchen has probably been through about 5 or 6 makeovers since we've lived in this house but that usually only consisted of changing the paint color on the walls and moving things around a little. But, for this makeover, I installed beadboard to the backsplash and built a new rustic center work table to show off a special birthday gift from my hubby. More on that in a bit.
Here is a close up photo of the beadboard backsplash. Installing it yourself is not hard at all and if you have a fairly small kitchen, like we do, it isn't expensive either, especially if you just do the backsplash area, and it really does transform a kitchen from plain to extra special.  One full sheet of white primed beadboard at Lowes was around $20, and that is all I needed for this project, as I already had some Liquid Nail and my handy nail gun. Oh, you will also need some sort of trim to trim out the bottom, if you want to do that, and that cost me around $10. To start, I removed my tile backsplash with a hammer and a pry bar thingy. Sorry, I don't know what it was called. :)
Then, picked a starting point and measured out length, height and distances to any outlets, as well as outlet measurements. I wrote all this down on a sheet of paper, which makes it much easier, especially if you have to cut holes for existing outlets in your backsplash.  I actually thought this would be quite difficult but was surprised to discover that measuring everything and drawing it out on your beadboard made it fairly easy.  And it got a lot easier with each panel that I cut.
After determining all measurements, I grabbed a yardstick and measured these out on my beadboard with a pencil, lightly.
Then cut with a jig saw. And yes, I was using a saw in my dining room. Each time I start a project that requires power tools, it is raining outside and we don't have a garage. But, I only had to make a few cuts inside before I was able to move everything outside when the rain stopped. I get a little too obsessed determined sometimes to get a project started and finished.  It cleaned up nicely, though, so no worries.
To cut out the holes for the outlets, simply take a cordless or regular drill and drill a large hole in each corner of the rectangle being cut out for the outlet. Then you have a place to fit your jig saw blade into to continue cutting out the remaining rectangle. Before you apply the liquid nail to the back and install, stick the beadboard up on the backsplash and make sure everything fits correctly. If it does, apply the adhesive and attach it to the wall. Easy! If it doesn't, cry back to the drawing board.  I also used my nail gun a couple times around the edges just to make sure it wasn't going anywhere. Continue with the rest of your beadboard until finished. Then measure, cut and add your trim. I just used wood glue to attach mine. Here is a good tutorial on installing beadboard.
Turned out pretty good for my first time, huh!?  It's something we've always wanted in our kitchen and wasn't costly or too difficult so I don't know why I didn't try it sooner.
I painted the Strawberries sign by using an end piece from an old crate, craft paints and sand paper. I wanted it to look like an actual piece from an old strawberry crate. Cheap art! Gotta love that.
This spice cabinet was given to us when we were out for an afternoon bike ride. It was yellow, dirty, and sitting on a curb. The owner just let us take it so we brought it home, cleaned it, primed, painted, and attached a base and a crown molding top.  And it holds some special things, my collection of vintage linens and all my baking and cooking spices.
The EAT letters are the cardboard letters from Hobby Lobby that cost $2 each. I painted them black, let dry and then dry brushed sterling silver craft paint lightly in some areas to give a metal look. Was kinda going for this look in Anthropologie without the cost.
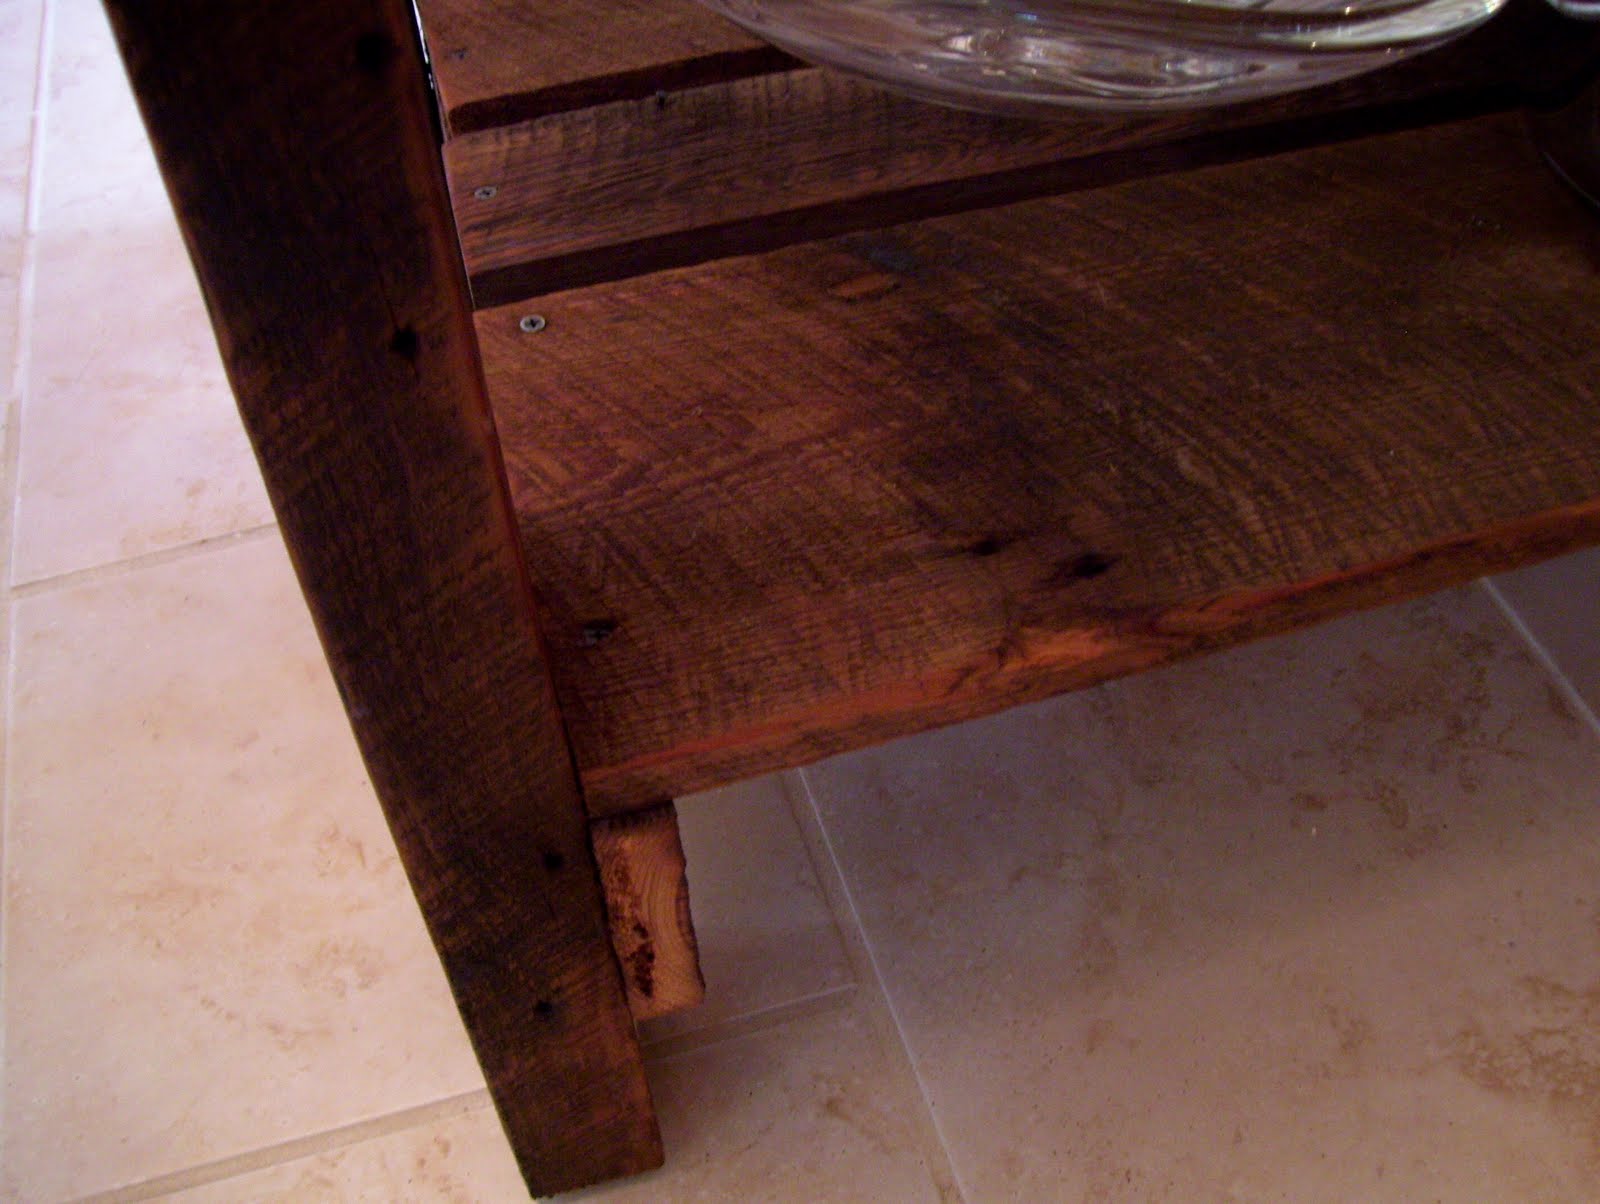
My other big kitchen project this weekend was building that rustic work table island. The whole project started because of this photo. I fell in love with those double towel racks on that center island so my hubby bought me one for my birthday. I wanted to attach it to something special and rustic to showcase it nicely, so, I decided to build a table from some more of the barn wood I used on my 
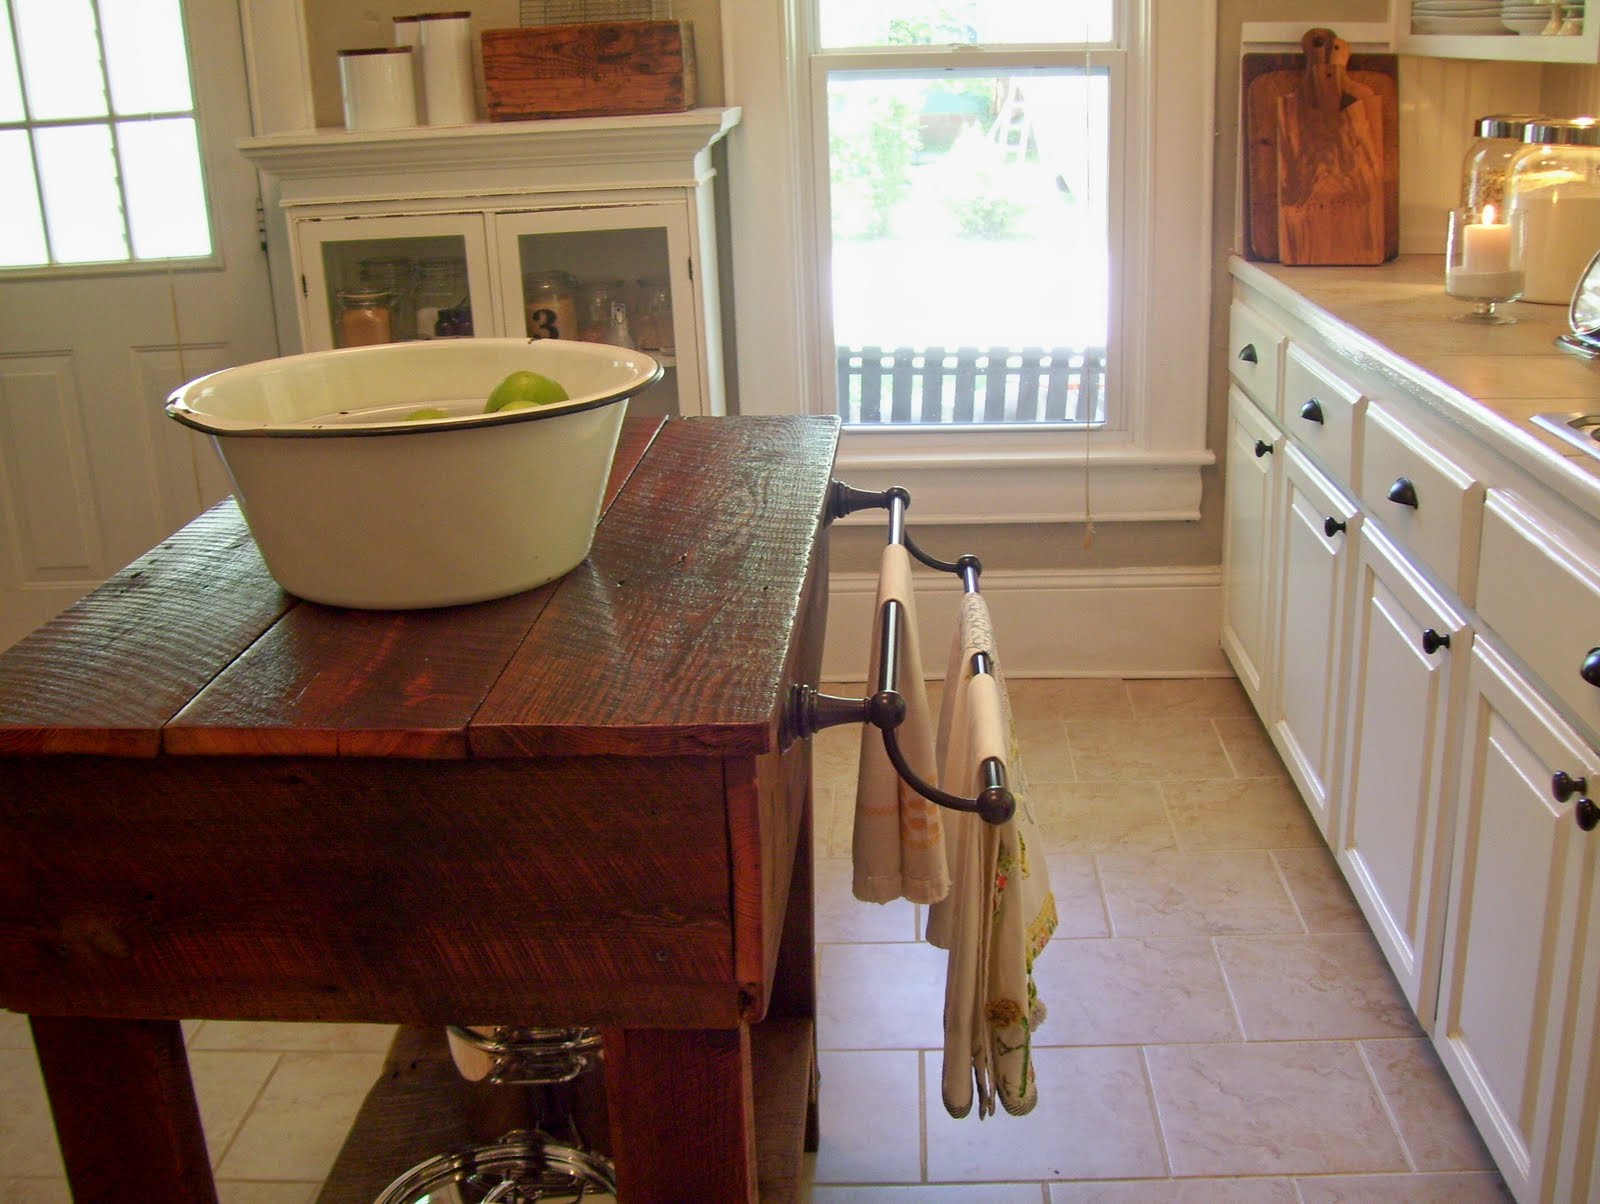
barn door headboard. I took the time to prepare this barn wood by sanding it down quite a bit with a palm sander until very smooth, and then putting on several coats of glossy polyurethane.  It really brought out the beauty of the wood and since it is also a kitchen work surface, I wanted to properly prepare the top.  I'm going to write a separate post on how I built it (because it's long), I think it turned out perfect for us!!  I love to mix beat up, rustic, old things with newer, modern things and I love the way this fits in our kitchen. It also goes perfectly with my made over bar stools. And the beautiful vintage style double towel rack displays my vintage kitchen towels beautifully. It just makes me smile to look at it.  I really like seeing the hardware used to build the table and the imperfections in the wood. Very rustic and lovely.  And my kiddos have fun sitting at it and chatting with me while I cook.  A very special piece.
My favorite room in the house is the kitchen, it is the heart of our home.
When we bought the house, there was no door separating the kitchen and pantry/laundry area. We bought that french door at a yard sale and hung her up. Worked out perfectly after some trimming of the sides, but it wasn't easy. Old houses are crooked.
The other side of the kitchen...my little cooking corner.
We couldn't be happier with how this turned out and it didn't cost a ton of money.  Didn't even cost a lot of money.  Most of the things in our kitchen were gifts, thrift or flea market finds or something I made myself.

The cabinets previously had doors but I removed them to display my white dish collection. By the way, you can get fantastic white dishes from The Dollar Tree. And they stand up very nicely to repeated dishwasher use. We have a set for everyday use and not a chip or crack yet. So, that's our kitchen makeover......for now. I am such a sucker for kitchen redos so I'm sure I'll be changing it up again soon when the mood strikes, but that special rustic table will always remain there.

Tuesday, May 17, 2011

Special Thanks

Just wanted to take a minute to say thank you for all the lovely comments you're posting. They have made me feel so happy and blessed. I'm having so much fun looking at all your wonderfully inspiring blogs and getting to know the blogging community. Thank you again!

I'd also like to thank Layla and Kevin from The Lettered Cottage for featuring Our Vintage Home Love yesterday in their Bedrooms post. I was extremely honored as they, and their blog, have been such an inspiration to me.   And also, HGTV for the nice feature on their Curb Appeal article.  What an honor! Thank you!

Check back tomorrow for my kitchen makeover. It's finally finished! Yay! Hope you all have a great day!

Thursday, May 12, 2011

It's the Small Things

After a rough day yesterday, I decided to go look through some local flea markets and came across this adorable vintage metal can. Isn't it cute? I love it! It's an old vegetable shortening can! Well, since I love to bake, I couldn't think of anything more fitting, so, I had to get it, right?! I filled her up with these gorgeous, snow white variety of stock I picked up at the grocery store. They immediately made me smile. Simple, pretty and cheerful.
They're going on my kitchen counter which just happens to be getting a mini-makeover. Since I have so much lovely barn wood to work with, I am building a rustic, farmhouse style center work table for my kitchen. Check back for that, and I promise I will do step by step pics for a tutorial should anyone ever want to build one as well. Happy day!
Sorry for the slightly crooked photos!

Monday, May 9, 2011

Basil Scented Lemonade

As summer fast approaches (yay!), my herb garden has been calling my name. And with the last couple of days being pretty warm around here, basil lemonade was the perfect drink in which to use some of the basil I just planted. In a word, YUM! This is really good lemonade with a hint of basil flavor, not too much, not too little, just enough to notice but not overwhelm. And if you aren't a huge fan of tons of basil flavor, this is perfect.
I am so excited to be using my own fresh herbs again for summer! If cooking with herbs is your thing, I highly recommend planting your own organic herb garden instead of buying them from the store. It's easy, you can use any container, if you don't have a garden bed, as long as you poke holes in the bottom for drainage and you will save tons of money, plus, there is a lot of pride in walking out to your garden to clip some herbs you grew yourself for a meal. You can find the lemonade recipe here. I used water instead of sparkling water. Try it! Happy day!