As the days get shorter and temps get cooler, we find ourselves craving those wonderful comfort foods of winter like, stuffed pastas full of gooey cheese, comforting soups and my kiddos favorite, ravioli. They are the perfect marriage of cheese and pasta in one perfect bite.
Making homemade pasta seems like a daunting task and it was to me too, but it was one of those things I wanted to learn to do. My youngest has serious food allergies and after a couple of very scary moments when he was a baby, it became clear that making homemade food was best for him. This ravioli is his favorite.
And let me tell ya, making ravioli from scratch is a heck of a lot easier, and faster, if you have one of these
gadgets.
It's a ravioli press and they are pretty inexpensive and save lots of time. And if you enjoy making your own ravioli, you gotta get yourself one.
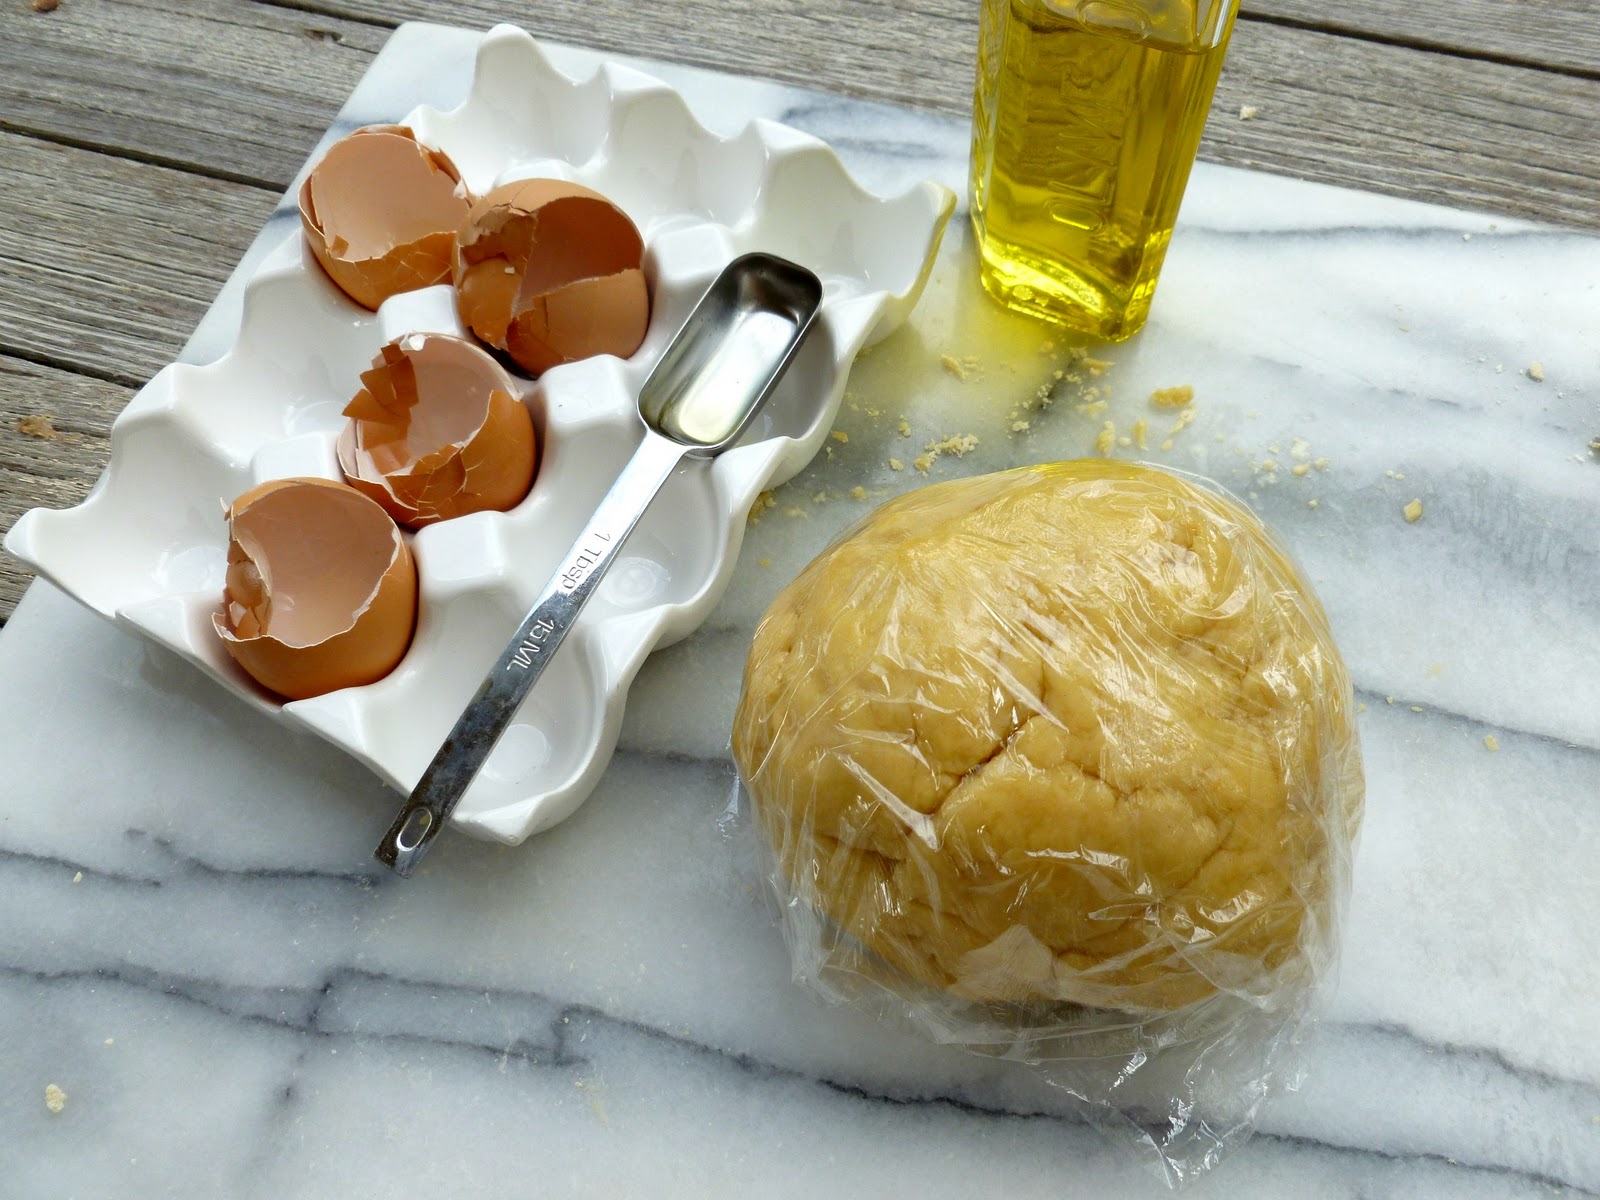
To get started with your pasta dough, grab these ingredients. I doubled my recipe here, however, the recipe listed below is NOT doubled.
I use eggs, olive oil, and two kinds of flour; cake flour and all purpose. Combine your flours and create a well in the center. Crack 4 eggs into it and then add your olive oil.
Whisk the eggs and olive oil until combined and slowly begin adding small amounts of flour until it is all combined and looks like this.
Dump the mixture out onto a floured surface and begin kneading. This part is a little work, so if you've had a bad day, this is a great way to release some frustration. :)
If it looks a little dry like mine does, add a little bit of water, about a teaspoon at a time, until it comes together but isn't sticky. It will look like this when it's finished.
Wrap it in plastic wrap and let it rest on the counter for about 30 minutes and up to an hour while you prepare your cheese filling.
The cheese filling I make consists of mozzarella, sharp provolone, ricotta and cream cheese. So yummy and cheesy and did I mention I am a huge cheese fan? Combine them all in a bowl and set aside while we make the cute little raviolis.
Take your pasta dough and cut into four equal pieces.
Take one piece of dough, wrap the others back up so they don't dry out, and roll it out a bit, then, if you have a stand mixer with a pasta attachment, feed the dough through it. I highly recommend the pasta attachment for stand mixers. It makes making homemade pasta so fast and easy.
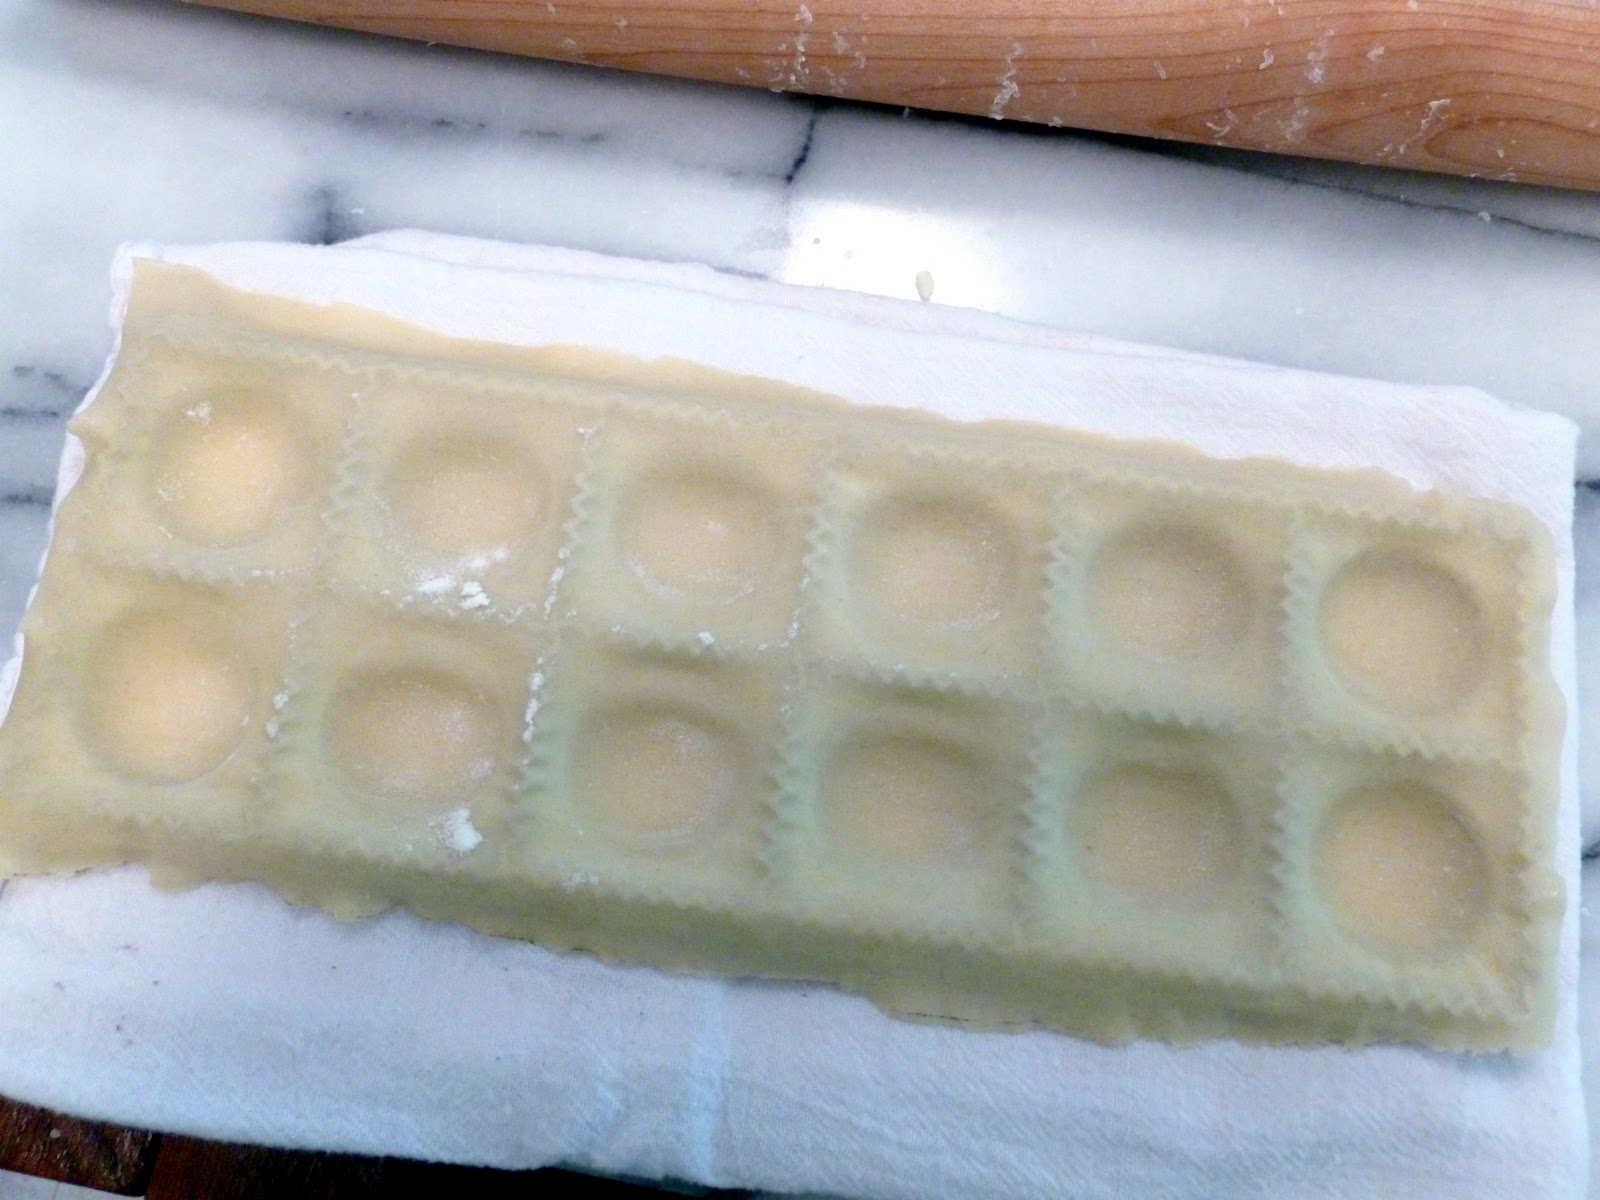
I start on the lowest setting, which is 1, and then go up to about a 7 for ravioli. After you've done that, take your ravioli press and lay it on a towel so it won't slide around on you. Lay your dough on the press.
And then take the top portion of the press, and "press" it into your dough to create little indentations for your filling. It's very important to grease the entire press, especially the plastic part, so your dough won't stick to it and cause you to throw a fit in your kitchen. Not that I did that or anything. :)
Now scoop your cheese filling in, about a half a tablespoon, maybe a little less.
Now take the rest of your dough from that section and place it over the top.
Press down gently with your fingers, then take a rolling pin and roll over the press to seal and cut the edges of the ravioli.
And that's it! You just made 12 ravioli! Turn it upside down on a floured baking sheet and pop 'em out.
Aren't they cute?!
Repeat that process with the remaining three sections of your dough and then you will have two baking sheets full of yummy fresh ravioli.
If you aren't eating these right away, pop the baking sheets into the freezer as is and let them freeze. When the ravioli are frozen, stick them in a freezer bag and return them to the freezer. Then you will have homemade ravioli whenever the desire strikes.
I like to do this on a rainy day. There is something so comforting about cooking up something special for your family on days like that. And I am not a pasta making expert by any means, this is just how I like to do it. When cooking it up, boil in salted water until they float to the top. Then combine with your favorite marinara, some fresh parmesan cheese and a sprinkling of baby basil leaves. This is why I love having the ravioli already made and frozen, I can get dinner on the table in about 20 minutes. Scroll down for the recipe.
Homemade Ravioli with 4 Cheese Filling
Pasta Dough3/4 cup plus 2 TBS all purpose flour
3/4 cup plus 2 TBS cake flour
2 eggs
2 TBS olive oil
4 Cheese Filling8 oz. ricotta cheese
4 oz. cream cheese
1/2 cup shredded mozzarella
1/2 cup sharp provolone
1 egg
To make pasta dough, combine flours, make a well in large bowl and crack both eggs into along with olive oil. Whisk, slowly incorporating flour until your dough comes together. If it's too dry, add very small amounts of water at a time. Form into a ball, wrap in plastic wrap and let rest at room temp. for approximately 30 minutes.
Prepare cheese filling by combining filling ingredients in a bowl. Set aside.
After dough has rested, cut the dough into four portions. Working with one portion at a time, flatten the dough into a disk and send through a pasta machine on the lowest setting. Roll through each setting up to setting 7.
Place dough across ravioli press and using the top portion of the press, press it into your dough to create indentations in your pasta for your filling. Fill with about a half a tablespoon of your filling and cover with another sheet of pasta dough. Take a rolling pin and roll across the dough to seal and cut the ravioli. Turn onto a floured cookie sheet and repeat entire process with remaining dough. After all ravioli are made, you can freeze them individually on the cookie sheet and then when completely frozen, transfer to a freezer bag, or cook immediately in salted boiling water. Ravioli are done when they float to the top.
I'm working on a thrift chair redo that I can't wait to show you! I'm so excited about it! And I've got another great giveaway next week so stay tuned! And have a great day everyone!


 I
I 


