Wednesday, November 30, 2011

I'm dreaming of a moss Christmas...


Little by little, step by step...


... small signs of the season are appearing here and there...


True to nature - both mine and Mother Nature herself - I keep on "mossing" the place.

The little "tree" above was made by a twig from the forest (with a convenient "tripod" at 
the top end), a moss ball and some conkers to keep it steady in the concrete pot.

***
And if we look the other way... 


Well, a mini Christmas tree has found its way in, subtly decorated with some tin hearts.


Perhaps I have gone a little overboard with the moss this year, but I find it a lovely way of introducing a natural, seasonal vibe to the house, and one which does not cost a thing! However, with fresh moss come a LOT of new house friends... and the slug that was found yesterday hanging in a thin thread of its own slime, dangling under the moss wreath I have made and hung above the kitchen table (will show you soon), well, he has been shown the door and will have to find somewhere else to celebrate the festive season!

Thank you so much for your kind comments on my last post and welcome to all new readers!

All the best,
Helena

I'm Over At Beneath My Heart Today

Hey there! I'm guest posting over at Beneath My Heart today. I was absolutely thrilled and honored when Traci asked me to join her for Simple and Inexpensive Christmas Decorating ideas. I just love Traci and her inspiring blog. And I can't wait to see how her current home renovations look when complete.  
Hop on over to check out our Christmas tree and a few ideas for decorating for the holidays in a simple and inexpensive way.

Have a great day!

Monday, November 28, 2011

Vintage Cabinet Redo

Hey there!  Hope everyone had a wonderful Thanksgiving holiday.  I was finally able to work on this cabinet that hubby found and let me tell ya, it had me completely stumped.  I just didn't have a clue what to do with it.  
No matter how much I stared at it, I came up with nothin'.  
But after some time away from it, 
I finally decided to just try to bring it back to its original beauty.  
Here is the before pic.
The top had a huge hole in it, so I removed that and bought another top at Lowe's for around 10 bucks.  
We attached the new top and I applied two coats of Minwax Special Walnut stain.
I decided to just leave the tin sides alone, but I did give them a good cleaning.  We removed all the hardware and I spray painted them with Rustoleum oil rubbed bronze spray paint.  I also gave the entire piece a couple of coats of Minwax special walnut to match the top and when it was completely dry, I gave it a coat of wax.  Here's how it looks now.
I really love the darker color.  This pic isn't that great because by the time we were done, it was dark and the kitchen is the brightest room in the house.  But after being stumped for days, I'm happy with it and even happier that it's finished.
What do you think of it?
My hubby and I have some very exciting news to share very soon.
Stay tuned!

I have just listed more bread boards.  If you're ordering for Christmas, I'm accepting orders until December 16, to get them shipped in time for Christmas.  
Thank you lovely readers!

Saturday, November 26, 2011

Warm Spinach Salad with Sweet Vanilla Bean Vinaigrette

Hey there!  Did everyone have a Happy Thanksgiving? 
Did you stuff yourselves silly like we did? 

We have been nursing our sweet little boy back to health so I wanted to make something fast and light today.  Although, with a stick of butter in the vinaigrette, I'm not sure it's light on calories.  But hey, all the healthy fruit and spinach cancels that out, right??  The warm vanilla bean vinaigrette is what makes this salad so special and I could seriously just drink it by itself.  It's that good. 

Also, this salad is a good way to get some veggies into your kiddos because of the sweetness of the dressing and the fruit added.   It's really a simple recipe and so yummy.  If you like vanilla or vanilla bean, you will love this salad.  Here's what you need for the vinaigrette.
Melt a stick of butter in a small saucepan.
To that, add 3 TBS of brown sugar and 2 TBS of honey.  Then scoop in the pulp of a vanilla bean and stir together until brown sugar is melted.  Now, I know vanilla beans are pricey, however, I buy my vanilla beans in bulk from ebay for about $15 including shipping.  I get about 30 beans and if you wrap them up tightly and store them in an airtight jar, they will last forever.  I use vanilla beans a lot so this is a pretty good bargain for us.  Much better than paying 10 bucks for 2 of them in the grocery store. 
Transfer entire mixture to a blender.  If you don't have a blender, just whisk for several minutes.
Add 1/2 tsp of vanilla extract and pulse (or whisk) until combined (about 2 minutes).  While pulsing, add 3 TBS of olive oil continuing to pulse to incorporate.  Pour into a small pitcher and keep warm.
I'm telling ya, I could drink this stuff without any salad.  Look at all those yummy vanilla bean specks.  So much goodness!  Set this aside and grab a 1/2 cup of chopped walnuts, toss them onto a small baking sheet and toast in the oven at 375 degrees for 5 - 8 minutes checking frequently.
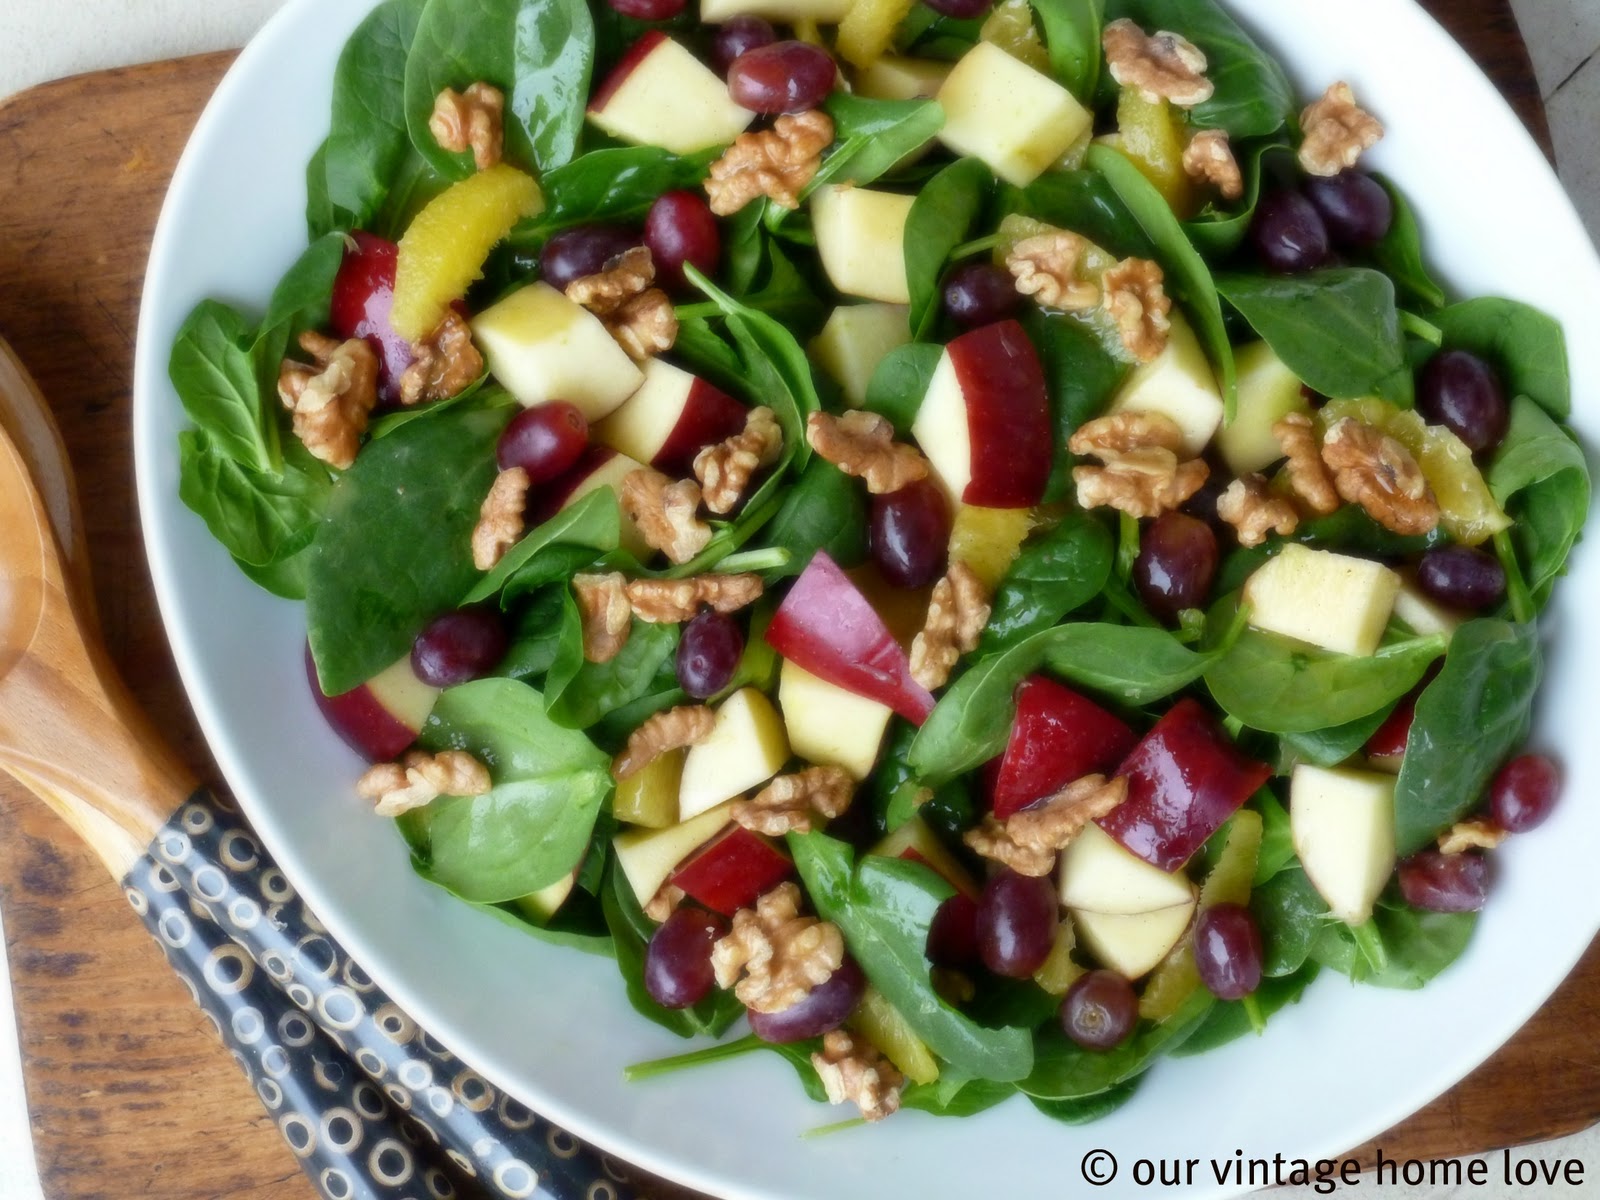
Set aside to cool while you assemble your salad.  For the salad you will need a regular sized container of baby spinach, 3 oranges segmented (or a can or mandarin oranges, drained), a couple large handfuls of red seedless grapes and 2 red apples quartered and then cut into bite size pieces.  You could also add blue cheese crumbles if you like those, we do not, so I leave that out.

Combine your salad ingredients and drizzle the warm vanilla bean vinaigrette over the top.  Enjoy!
Here's the recipe:

Warm Spinach Salad with Sweet Vanilla Bean Vinaigrette
For the Vinaigrette:
1 stick melted butter
3 TBS brown sugar
2 TBS honey
1 vanilla bean
1/2 tsp vanilla extract
3 TBS olive oil

Melt butter in small sauce pan and then add brown sugar and honey, stirring until melted.  Add the pulp of a vanilla bean.  Transfer to blender and add vanilla extract and olive oil.  Pulse until combined.  Keep warm.

For the Salad:
1 package baby spinach leaves
2 handfulls red seedless grapes
2 red apples, quartered and cut into bite size pieces
3 oranges segmented, or one can mandarin oranges, drained
1/2 cup walnuts, toasted

Combine all ingredients in a large salad bowl and drizzle warm vanilla bean vinaigrette over the top.

Thursday, November 24, 2011

I have heard a whisper...


... that something special is happening quite soon...


... which will involve flying reindeer and awkward incidents with chimneys and bellies too big...


So I have started gathering my moss and planting my hyacinths...


... because I heard it all from a pixie in Lappland... so it must be true!

***

Last year, this room looked like this:


... and I think there is a chance those NOEL letters will soon emerge again, 
and pine cones may find themselves potted and "mossed"!

Wishing you all a lovely weekend!
Helena

Tuesday, November 22, 2011

I'm Over At AKA Design Today

Hey all!

I'm guest posting over at AKA Design today and I've got a fun Christmas inspired wooden sign project how to!  Be sure to click here and check it out and also make sure to check out the rest of their amazing blog, such inspiration!

Have a great day!  I'll be taking the rest of the week off to enjoy the holidays with my family!  Hope you all have a wonderful Thanksgiving!

Monday, November 21, 2011

DIY Christmas Gift Tags

Happy Monday to you!  Although I wouldn't actually call a Monday a happy day, it's a short week and Thanksgiving week, too!  I don't know about you, but that makes me pretty happy.

Tis the season, it's almost gift giving time, one of my favorite things to do ever, and that means lots of possibilities for pretty packaging.   When I saw these oh so cute vintage school styled gift tags at Anthropologie, I just knew there could be a way to DIY them.  So how lucky was it that I came across this easy tutorial for them over at Flamingo Toes.  It's super simple and cheap, my kind of project, so I spent an evening whipping these things up and I just LOVE them!  Here's my version.....
All you need is card stock, red thread, blue thread and thin hemp twine, or whatever kind of twine you prefer.  Flamingo Toes even provides you with a template to print off to make it easier.  For teacher and coach appreciation gifts, I picked up these fun kraft gable boxes, available here, and some red and white twine, available here.  
 They reminded me of a lunch box so I thought they would be perfect with the school themed gift tags.  Fill the boxes with yummy baked goodies and you have a simple perfect gift to show your appreciation for those that spend so much of their time teaching our children.  I can't wait to get to work on mine!
If you'd like to make these cute little tags yourself, click here for the easy tutorial!
Have a great day!!

Friday, November 18, 2011

Happy Weekend

Hey friends!  I apologize for the lack of posts this week.  What a week it has been!  I had hoped to work on this....
But it is still sitting right there, just waiting for me to spiff it up.  I'm fairly certain I've decided what I want to do with it and hope to finish it up (or at least get started) this weekend so I can blog about it next week!

Have a great weekend all!  What are you working on?

Monday, November 14, 2011

Vintage Cabinet and $50 Visa Gift Card Winner

Happy Monday everyone!  Did you have a good weekend? 
My hubby is in the process of cleaning out a few storage units he purchased so he has been bringing home fun things for me to play with.  His latest find is this cabinet that I've not figured out what to do with yet.  Here it is in it's original state.
I think it is beautiful but I'm not really sure what it is.  Does anyone know?  The end reminds me of a little pie safe with it's tin sides and shelving.
 
The hardware is beautiful but I'm not sure I want to keep the hinges.  However, I love the door handles so they are staying.
The top has a hole in it and will have to be replaced.  And I haven't decided if I want to paint it or just improve it's original features.  
 I'm also not sure if I even like the tin sides.  I love the aged tin sides on this piece from Anthropologie.
 I wonder if there is some sort of treatment I could apply to the tin to replicate that look.  
Anyone know?  Lots of decisions, huh!  What do you think?


P.S.  The random number generator has selected 199 as the winner of the giveaway and that belongs to:

Gail who's comment was: 
"I found the blog site, Yeah!!! LOl. I love the end tables...I must also say, I liked the swirl...haha But I would never have had the forsight to turn them into end tables with reclaimed wood. They are beautifyl!!!"

Congratulations!!  Please email me your address info via the contact page and we will send this to you so you can enjoy it!  Have a great day all!

Sunday, November 13, 2011

Weekend walkies...


So what does one do a sunny weekend in November...?


One could perhaps go for a muddy walk...


... maybe enjoy a few minutes of watching grown men cuddling on the ground
(forgive me, all rugby fans, I am a little ignorant of the rules of this sport)...


 Perhaps admire the view of another back-side (the clue is in the moo)...


But best of all, one could enjoy a competitive game of Pooh sticks! As in Winnie the. As in drop a twig on one side of the bridge and hope it comes out first on the other. And if it doesn't, claim the one that did was yours. Perhaps not in the best Winnie the Pooh spirit, but boys will be boys. Need I say the worst looser is the oldest "boy" of the three...?


Thank you for all your lovely comments on my last blog post. 
I wish you all a brilliant start to the new week!
Helena

Friday, November 11, 2011

Kids Snack Tray Ideas

Happy Friday everyone!  Just wanted to share a fun idea with you in a short post today.

I came across these old metal trays going through a box of junk and I thought surely they could be used for something. 
They've certainly seen better days, right?  Anyway, I grabbed a can of this.....
And gave each one a few coats and let dry (after I gave them a good cleaning).  Here's what I did with them....
I thought it would be fun to use them for snack trays for the kiddos.  My older children are, well, too old to enjoy them, but my youngest is certainly having fun using them for his after school snack.  Include a piece of chalk and they can have a little fun while eating their snack or meal.  If you have a lot of them, they would also be lots of fun for a kids party. 

Have a great day and weekend!

P.S.  Our $50 Visa Gift Card Giveaway is still going on so if you haven't left a comment on this post to enter, be sure to do so before Sunday!

Thursday, November 10, 2011

A sticky American situation...


Those of you who have been following me for some time now know that I have a weakness for several interior styles, one of which is the star-studded "New England" style...


So yesterday, when I made some 
American pancakes as a special treat for the boys ...


... the craft-starved yours truly just had to play a little making instant mini-bunting 
("instant" here reads "glue" rather than sewing machine) and flags to top off...


... the pile of pancakes covered in drippy, sticky, gorgeous American syrup...


And all this just because a few weeks ago I happened to stumble upon ...

... a local gem...


A fabulous little vintage café in our neighbour village Box... 


Toast Coffee House is owned by lovely Lucy and Simon Wright, 
and not only do they always make you feel very welcome...


... they have created a fabulous little slice of vintage heaven in their former garage (!),
offering coffees, cakes and lighter bites, which you can enjoy at one of the old wooden tables, 
whilst you listen to the shelves whispering tempting tunes of pretty tins and yummy foods...
(Love the coasters Lucy has made from old grain (?) sacks! - Not for sale.-)

***

Again, I bow humbly at your incredibly kind words on my last blog post. I am very frustrated I have not got the time to visit you all and tell you in person how happy and "lifted" I feel when I read your amazing comments, but thank you, THANK YOU! Every comment is like being given a hug and an approving pat on the back, and I soar. I think I might just have the loveliest readers in the blog universe!

Helena